Project1 : Laser Cut - Cut file
Before getting into the material cutting stage, I made some design changes and divided my design by layers. Below are the captures of my working file, showing design changes.

< Original Design >

< Changed Design >
As you can see, I got rid of the top and bottom wings of the original design and rotated the original design. The reason for doing so is to get rid of the part that doesn't have much design benefits and make economical result. I thought since my design has lots of detail including feather like parts, the file size has to be fairly big to actually make those details visible. And in that case, I had to buy many materials and I couldn't afford it. The type of material I prepared were 2 types of plywood, both in 1/8" thick and 12 x 24" size. One kind looks fairly wably and actually it is not strong enough to hold itself straight even. The other kinds was strong enough to hold itself straight. I chose my design size to fit in 12 x 10" so I bought 3 plywood. Unfortunately, the machine was broken in school, so I couldn't have any chance to actually cut it yet. I will try again later this week when it gets fixed.
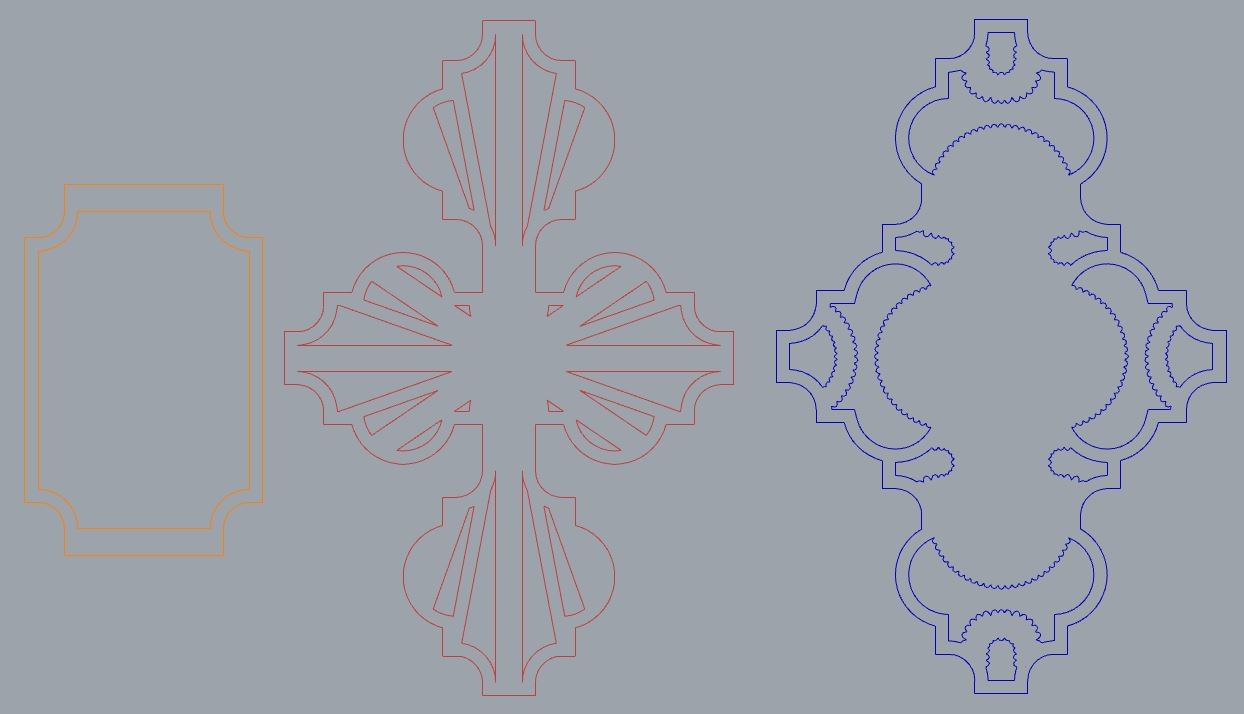
Below are the cut files that I have made so far.


From top left, they are supposed to be stacked up. I realized that the feather design actually need different design to achieve my original design, since when they are made in cut file, they actually lost a lot of individual looking details and it just looks like a toothed wheel. I am thinking of adopting some lines on angles so that it will get the detail back. When making cut files, I made it sure that the after cutting line of using mirror feature, the design is not off the original design. I always double checked whether the ends of the lines are actually meeting after editing. And at the same time, I tried that there are no overlapping lines are left after editing. The commands that I used to make each layers are 'join' 'split', 'mirror', 'move' It look so long time to visualize each layer from the design. I had to consider whether the design are each to cut or not by connecting all the parts all together. And at the same time, I had to make sure that the overlapping part are being made as I intended.
I am missing top of another a couple layers that are not finished, but I am not too far from the finished cut file.
- Oct 24, 2022 Update -


I finished making cut files and let it sit in 12x24" square for laser cutting. In this process, I made changes to the original cut file that was uploaded above. I used "Scale2D" to fit everything in the cut file size with keeping same proportion. And changed individual layers into Cut layer, using red lines and left black line for engraving. I was told that as far as the lines are black, the laser cutter will engrave it so I don't have to make a separate layer for engraving.

<Original Files>
The grey lined structures of the first photo and the red lined structures in the second photo doesn't have squared lines in between 4 oval structures, unlike the blue lined structure of the second photo. Originally I thought I was not going to build those square lines on them, since I don't need that structure on those layers, but later on, I changed my mind since I thought having same outlines on all the layers will make the compound structure more durable.
So I made changed on those structures and you can check them on the 2 left sided structure from the photo below.
< Changes made, on the 2 left sided structures. >


댓글
댓글 쓰기