Project 8 Submission : Papercraft Objects: Final Revision
1. Making solid connection between objects.
2. Re-design parts with short height that couldn't be assembled as three-dimensional parts. (Scale issue)
3. Add decorative parts for more realistic look.
For the first matter, I received a feedback of making extensions on one side of the neck which can be attached with body more securely. Also there was another opinion saying lengthening neck and attach with bridge part that will come out from a whole of the guitar body. And as a solution, I combined these two approaches. I lengthened guitar's neck and made it sort of penetrate the guitar body all the way through. With this way, the body and the neck were securely connected. Also, the sturdiness of the body was enhanced since lengthened neck worked as a skeleton of the guitar body. And to make this happen, I adopted a larger paper to lessen the number of the body pieces. It used to be 3 pieces to fit in smaller size of the paper to be printed on. This time it was 2 pieces and it newly had a hole and new taps to allow neck to go through the body and be held in it.


For the second matter, I printed many of the same shape and stacked them together to build heights. The machines sits on the head gear and pickups were made in this way.

For the third matter, I tried many approaches. Firstly, I added frets on the neck. Secondly, I attached a nylon string to the bridge and the head machine to express strings of the guitar. Thirdly, I installed a wire inside of the knobs on the body so that it could actually be turned. Lastly, nut was newly made in installed at the end of the neck and below it, there are additional angle made so that the head will be attached in angle. It used to be attached flat to the neck and it didn't represented guitar's real look.
Besides these, I found that the glue that I used was not suitable for these projects, so I took advice from Molly and equiped with a stronger adhesive and wood sticks for even apply of the glue. I also found poster boards that is slightly sturdier than card stock papers and adopted them. I had to cut 2 times because of their thickness, however they definitely helped objects to be held stronger than before.
Some pieces were edited to have wider taps or the taps were moved to other spots for secure holding.
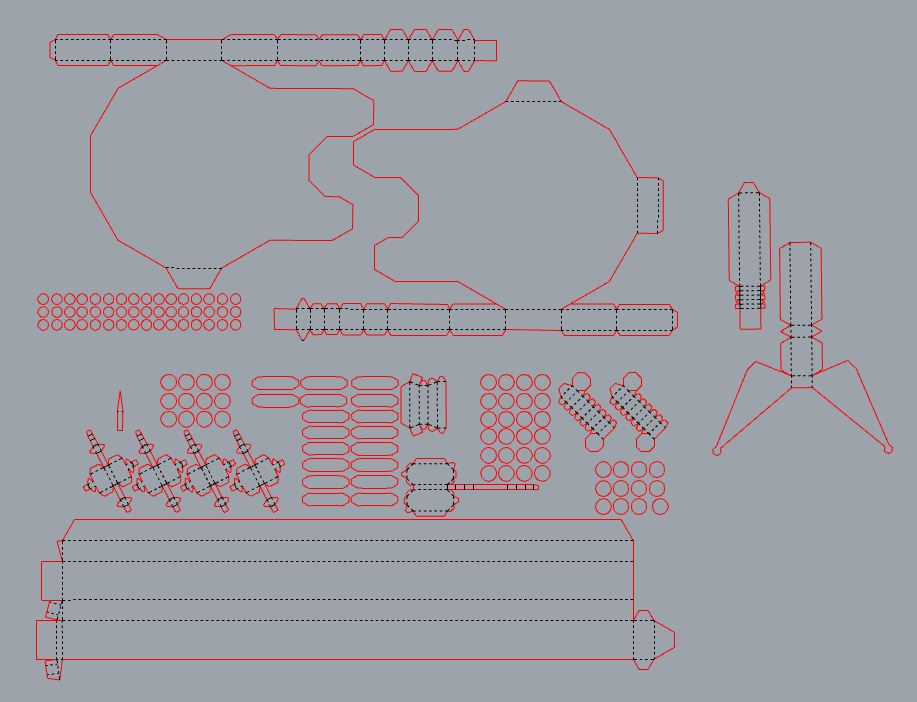
The blue print
The Final Look


I also paid my attention to make it playable.


댓글
댓글 쓰기